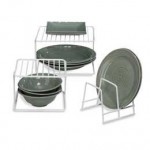
 We’re on a Freedom Journey (Dishes) that will declutter and organize your kitchen in 21 days, using about 10 minutes per day. Three weeks will come and go. If you are able to join us on this Freedom Journey, after 21 days, you will be celebrating in your newly organized kitchen. You can do this.
(If this is your Day #5 with us, you’ll notice a pattern. :-))
Remember, first we declutter. Then we organize.
Declutter
- Gather all the clean dishes in your kitchen (everyday and fine china – plates, bowls, cups, saucers, etc.). Look in all the drawers and cabinets, on the countertops, in the clean dishwasher, and the drying rack.
- Sort “like items with like items” – designate areas on the countertop or table – first by pattern, then by type of item: dinner plates, salad plates, cups, saucers, etc.
- Purge through your areas. Designate new areas on the countertop or table as Donate, Sell, Trash, Recycle, and Repair areas. You can mark the designated areas with post-it notes or a slip of paper with each title on it. Check for cracks or chips that cannot be repaired. Remove anything you think is unusable, and place it in either the Trash or Recycle piles. Place any items that can be repaired into the Repair pile. Remove any items you no longer use, love or want, and place them in either the Donate or Sell piles. Be brutal here. If you know you’re not going to use it, pass it on to someone who will. (When you decide whether to Donate or Sell an item, keep in mind the time, effort, and energy it will take to sell it (auction, garage sale, one-on-one, etc.). Make sure your return on investment is worth it. Consider unchaining yourself from that item by putting it straight into the Donate pile. Someone else really needs it.)
- Make a Purge Storage Area. This could be individual paper bags, plastic bags (different than your regular trash bags), boxes, containers, or a section in your laundry room or garage. Label your containers to avoid confusion. Place your Donate, Sell, Trash, Recycle, and Repair piles into the appropriate container. Place that container in its designated space until you get ready to dispose of these items.
Organize
- Take a look at the remaining dishes – remember, you use, love or want them.
- Where do you want their home in your home to be? Where will they fit? Drawer? Cabinet? Shelving? Pantry?
- Do you have a space in which you want to continue to house them? Will they fit in this space? Do you need to buy organization products to help stack these items? If the items will not fit in this space, you may have to go back to the purging step (Donate or Sell).
- Locate your selection in which to house these items.
- Place your items into their home.
- Enjoy being able to find your dishes whenever you need them.
- Remember to return your dishes here after each use.
Congratulations! You did it! We’ll continue your Freedom Journey tomorrow. There are only 16 days left to your newly organized kitchen.
“You, my brothers, were called to be free. But do not use your freedom to indulge the sinful nature; rather, serve one another in love.” Galatians 5:13 (New International Version)


 Facebook
 Twitter
 LinkedIn
 RSS
RSS Youtube
 Delicious